
Scanning Photographs
Get To Know Your Scanner!
Scanning photographs by adjusting your scanner’s settings to obtain a sharply focused, high resolution digital image will always give the best results for photo restoration and retouching. Get to know your scanner settings, and the step by step instructions on scanning photographs below should apply to most home flatbed scanners. Contact me if you have any difficulties!
Gently wipe your photo clean of any dust or particles with a soft clean dry microfibre cloth or a soft clean brush.
Make sure your scanner glass is clean; smudges or fingerprints can be removed by spraying a little mild non-ammonia household cleaner on to a cloth and wiping the glass gently, then polishing dry with a dry microfibre cloth.
If the photo is stuck behind glass, do not try and peel it off as in most cases the photo will scan effectively through the glass. Just give the glass a wipe or clean as detailed above, making sure to prevent all moisture and cleaning products from touching the photo.
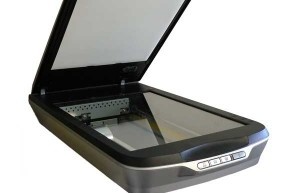
Turn your scanner on and place your photo as per your scanner’s instructions. If it is not lying flat you may find it necessary to gently weigh it down with a book.
Open your scanner software. Do not use the automatic mode as you need to vary resolution etc. You should be able to select the following options;
Document Type: PhotographImage Type: Color (Always select ‘Color’ even if your photo is black and white, this results in a file with greater depth of digital information and enables many more functional possibilities for editing in Photoshop).
Resolution: This is where things can get a bit technical, and there is a lot of confusion on the subject! It really depends how big your original photo is and how large you would like your finished photo. If scanning negatives a higher resolution such as 2400 dpi or more is needed as they are so much smaller than the usual output. As a general guide for photos I will usually select a resolution of 600 to 800 dpi, if the photo needs to be enlarged a great deal then I will choose a higher resolution such as 1200 dpi. I will discuss resolution in greater detail in another post.
If your scanner software has any image adjustments available such as colour correction or sharpening, please leave them all unchecked! They can be very destructive, it is best to have the file in its original, untouched state.
File Save Destination: Check where the software will save the scanned photo, and change this if necessary. Also change the File Name if desired.
File Save Settings: TIFF is the highest image quality format available and usually preferable but sometimes the large file sizes can cause difficulty sharing files. An option can be to save the photograph as a JPG but try and choose the best quality, lowest rate of compression possible.
Select ‘Preview’ if available in the software settings and check that the scanner registers the entire photo. It may be possible to draw a marquee or selection box around the photo to eliminate unnecessary areas.
Select ‘Scan’.
Check your jpg file to make sure your photo is all there and uncorrupted.
Email it to me for a free, no-obligation quote or alternatively there are various options for sharing larger files, such as Google Drive or Dropbox.
